Marking an appointment as arrived or other status
Marking an appointment as 'Arrived'
- On the Appointments screen, click on the appointment you want to select.
 Note: You can also select an appointment by searching for the client and selecting the appointment from the returned results.
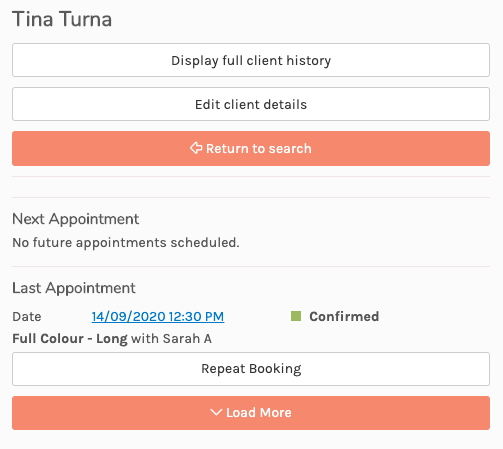
- Click on the Arrive button from the slideout menu.

- The appointment will now change colour to indicate that the client has arrived.
 Note: If the client has any outstanding forms or notes, these will be displayed on the screen upon changing to Arrived.
- The client will also show in the Waiting List. You can see this by clicking on the Waiting List tab in the Appointments screen. From here, you can Start, Edit, Send SMS or Cancel the appointment.
 Note: For more on Waiting Lists, please see the Self Check-in / Waiting Lists help articles.
Manually confirming an appointment
- On the Appointments screen, click on the appointment you want to select.
 Note: You can also select an appointment by searching for the client and selecting the appointment from the returned results.
- Click on the Confirm button from the slideout menu.
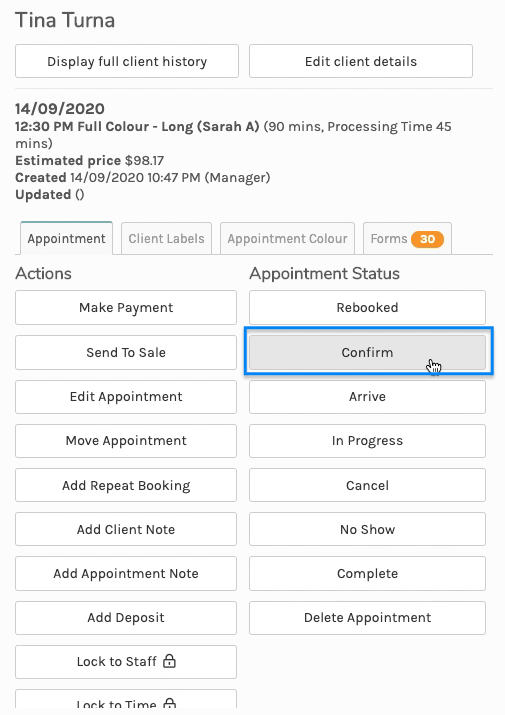
- The appointment will now change colour to indicate that is has been confirmed.
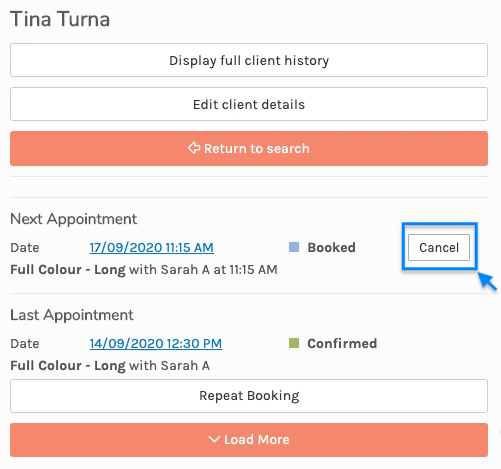
Cancelling an appointment
- On the Appointments screen, click on the appointment you want to select.
- Click on the Cancel button from the slideout menu.
 Note: You can also cancel an appointment by searching for the client and clicking the Cancel button of the appointment.
- The Cancellation Pop-up will now be displayed. Here you can do the following:
- Enter a note to be recorded on the client's record
- Send a message or email to the client
- Cancel future repeat appointments Once you have entered your notes and selected your desired options, click OK.
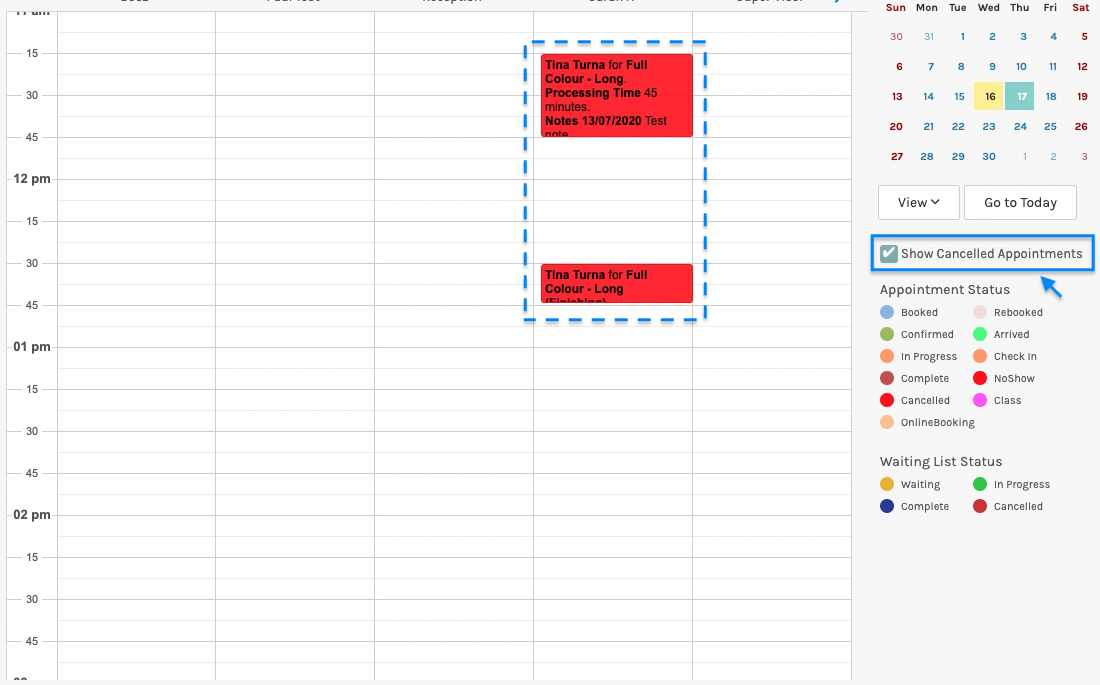
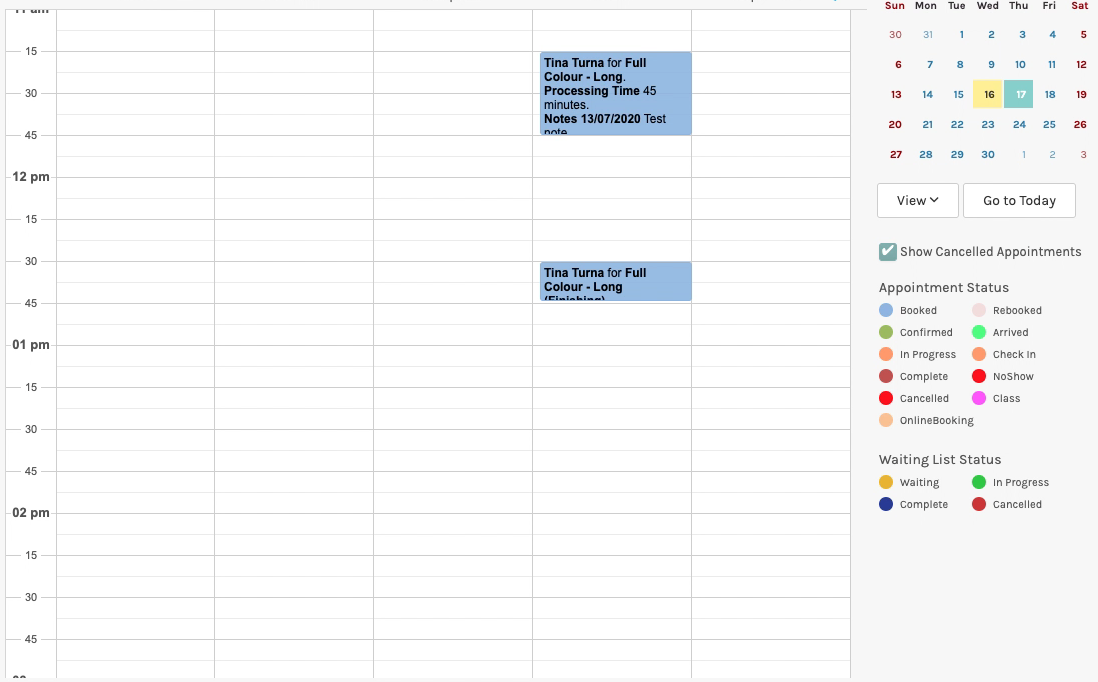
- The appointment will now be removed from your calendar. You can show cancelled appointments by ticking the Show Cancelled Appointments checkbox on the right.
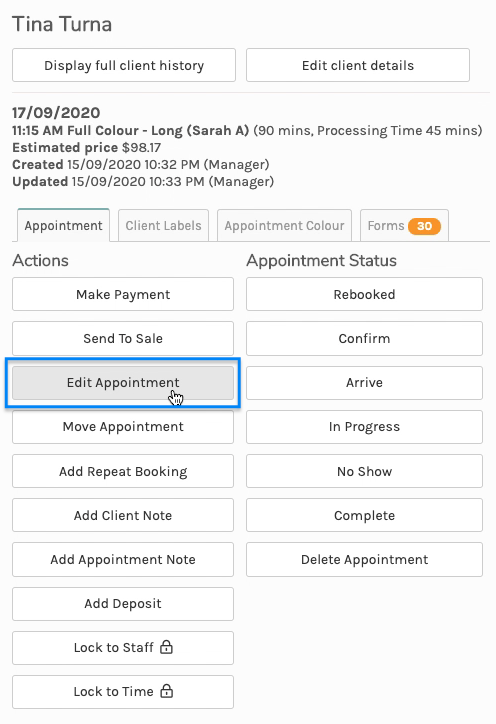
Rebooking a cancelled appointment
- On the Appointments screen, ensure Show Cancelled Appointments is ticked, and click on the cancelled appointment you want to select.

- Click on the Edit Appointment button from the slideout menu.
- Confirm the date, time and selected services for the appointment, then click Save Appointment.
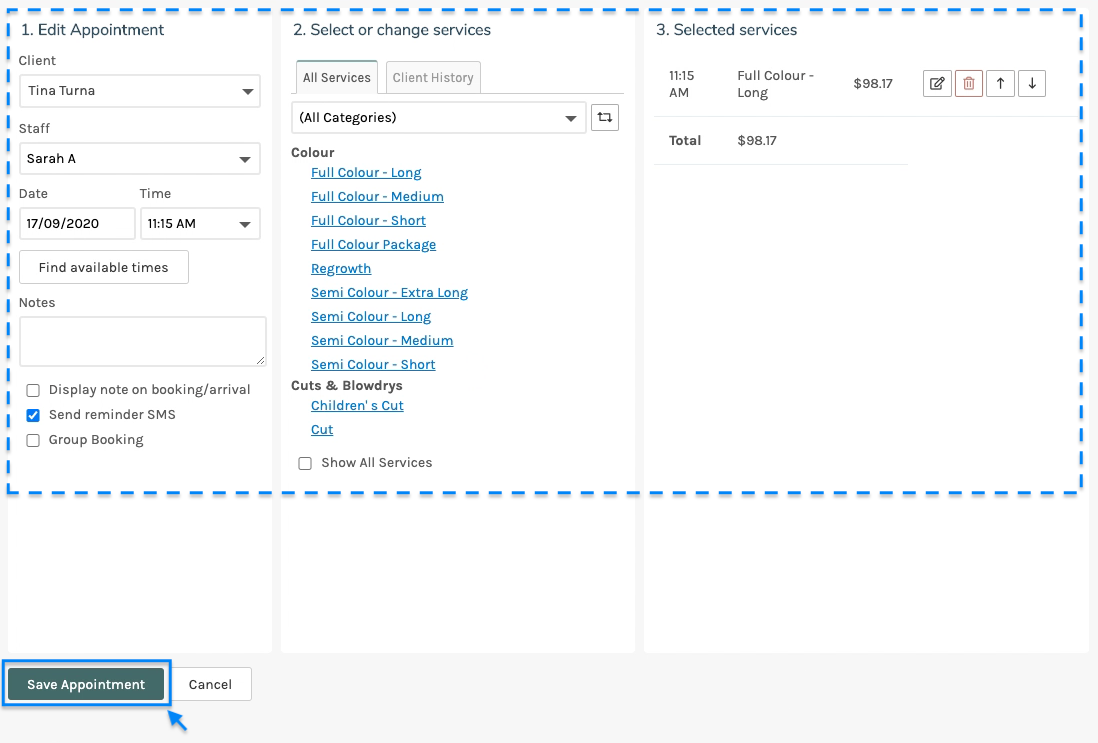
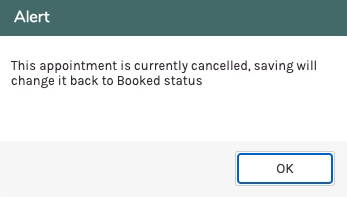
- An alert will be displayed confirming that the appointment will now be rebooked. Click OK to continue.
- The appointment is now booked.
 Note: You can also select an appointment by searching for the client and selecting the appointment from the returned results.

 Note: If the client has any outstanding forms or notes, these will be displayed on the screen upon changing to Arrived.
 Note: For more on Waiting Lists, please see the
  Note: You can also select an appointment by searching for the client and selecting the appointment from the returned results.


 Note: You can also cancel an appointment by searching for the client and clicking the Cancel button of the appointment.

 Once you have entered your notes and selected your desired options, click OK.


